04-Write Jetson Original System
This tutorial reflashes the official NVIDIA system image to Jetson Orin boards.
This is not the recommended path for beginners. If your factory image works, use 03-Installing Jetson Environment instead.
1. Before You Start
- Back up important data.
- Confirm you need a clean image.
- Ensure stable USB and internet connection.
SUB Orin Nano / Orin NX users: this method may not enable MAXN mode.
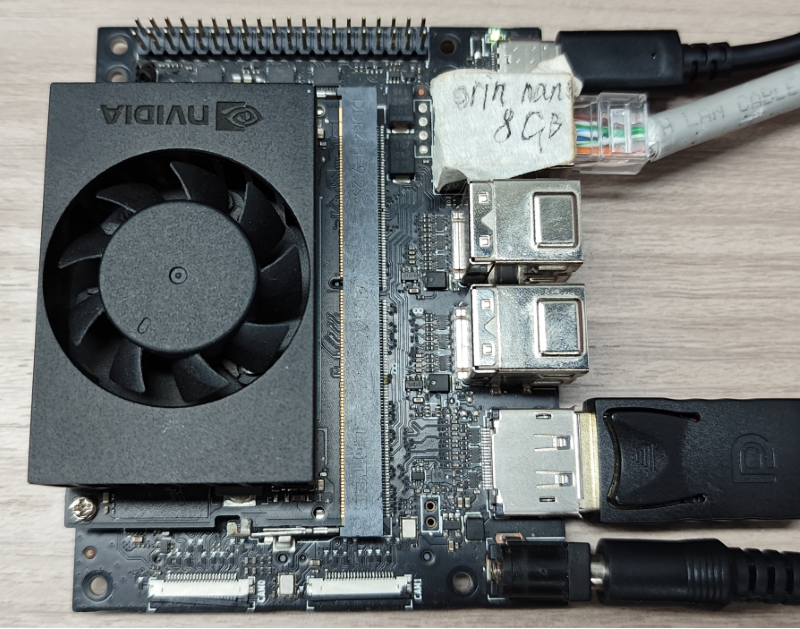
2. Hardware Connection
2.1 Enter Recovery (Flashing) Mode
Short FC REC and GND under the core board.

2.2 Connect Cables
Connect DC power, DP cable, Ethernet, and Type-C to your host machine.
3. Host/VM Connection
The tutorial uses VMware Workstation 17 Pro.
Attach the USB device from VMware menu:
Virtual Machine -> Removable Devices -> NVIDIA APX
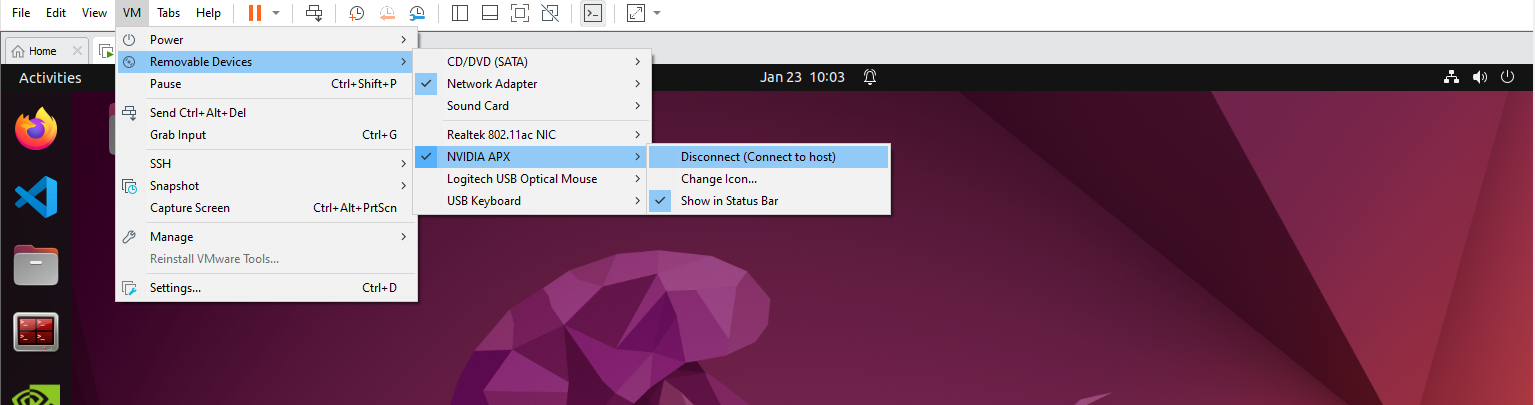
You can verify APX mode with:
lsusb
4. SDK Manager
Register/login with NVIDIA Developer account.
SDK Manager download:
4.1 Install SDK Manager (if needed)
sudo dpkg -i sdkmanager_2.2.0-12028_amd64.deb
sudo apt --fix-broken install -y
4.2 Start SDK Manager
sdkmanager
To access archived JetPack versions:
sdkmanager --archived-versions
4.3 Follow STEP1 to STEP4
- Select your exact board model.
- Confirm options in STEP1.
- Select required packages in STEP2.
- Wait for flashing in STEP3.
- Confirm success in STEP4.
If USB disconnects during long flashing, reconnect the Jetson USB device to the VM immediately.
5. First Boot After Flashing
- Remove FC REC/GND jumper.
- Boot in normal mode.
- Connect display and complete initial Ubuntu setup.
If device is not recognized, power cycle board and reconnect Type-C.